
I've outlined the steps I took to create my newest page and am sharing it for anyone who is interested in how my pages evolve or is curious about how to get started on their own pages:
Step 1: Base Layer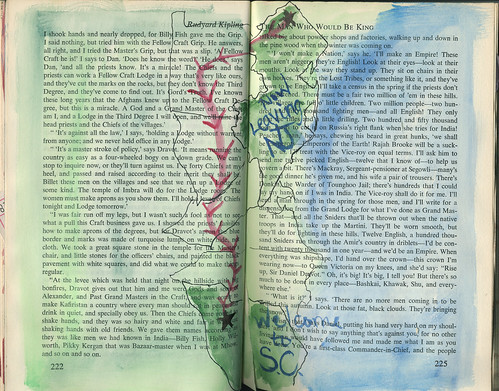
Typically the base layer consists of just the big blotches of watercolor paint that will become the background. I scanned this a step later in the process after I had added some simple ink outlines and a few more touches of watercolor.
Step 2: Collage Layer 1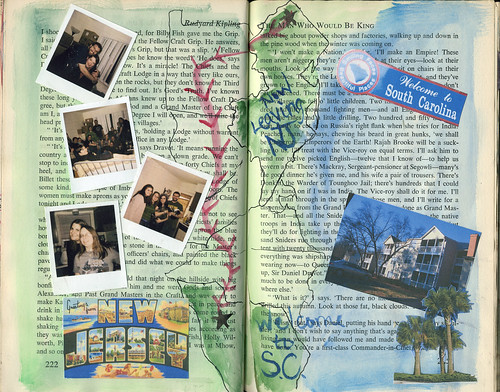
This is my main collage layer. Pieces I glue down here are typically the biggest, chunkiest elements on my page.
Step 3: Collage Layer 2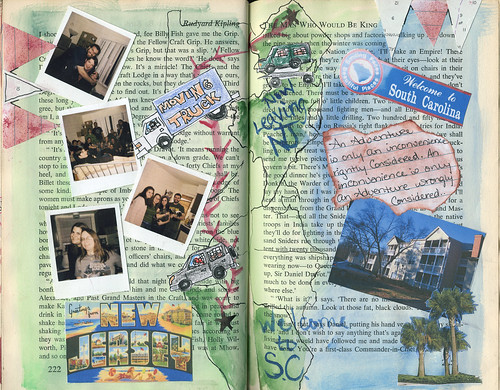
Not much has changed in this step, but you can see that I've added my smaller collage elements as well as a chunky element that I wanted on my top layer. If you click on this image it will take you to my Flickr page where you can view it larger.
Step 4: Final Touches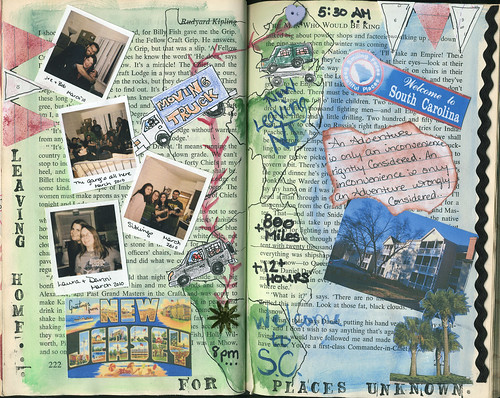
If you wanted to do more than 2 layers of collage, those steps would come before the finishing touches. Here you can see I've added a few final inky phrases and details, such as writing on the wee polaroid photos, the departure and arrival time of my move and other statistics. I've also added a heart shaped button over my home and a shiny star over my new town. I also added a piece of rick-rack to help frame out and balance my spread.
I hope this is helpful and that you're all having a great time working in your journals so far!
Absolutely nice! I am working on my, but I think I will be able to post pictures only at the end of the month because I have to borrow a camera, ours went crap:)
ReplyDeleteLovely stuff! I really like the idea of using an old book....I have this compulsion to rescue old books out of people's garbage piles...lol.
ReplyDeleteI'm working on my blogger layout so hopefully I can get ye olde button up in the next day or so...
~m.
Very nice! Wish I could do stuff like that...and it come out looking awesome like that!
ReplyDeleteI am ready to work on my journal, but have to finish some other pieces before I can. :( I will get it going and soon.
ReplyDeleteThe page turned out really well! Thank you for showing the steps you took to create it. It's always interesting to see how each person approaches different pages.
ReplyDeleteReally nice. I love your train of thought and how you led your viewers through your steps. Nice job.
ReplyDeleteThis turned out wonderfully! ^-^
ReplyDeleteI think I'll put some water colors on my next page perhaps... ^-^
Your stuff come out looking so cool. I'll be posting pics of mine later today. Ummm... it won't be that beautiful like yours... but it's coming along.
ReplyDeleteThanks, Danni. I love your stuff.
Bird
Those are wonderful collage sheets! What great tips!
ReplyDeleteThank you for that!
What was is the bag was a light fixture we had bought and was being held at a store until we could pick it up... I guess they wanted to make sure we knew it was all in "One Big Bag" I just thought it was funny~: )
hi!!!! your journal pages are fantastic!!! i am a fairy-witch and i have been art journaling since i was a little girl!
ReplyDeleteso please put me in your list because all this month i'll art journaling!!!
oh!!! my link is www.apinkdreamer.blogspot.com
ReplyDelete